Pages

Halloween Scavenger Hunt {Little Ones Learning}

Tuesday, October 29, 2013

Our neighborhood has a lot of festive Halloween decorations up, so I thought I could add a little fun to our daily walk by creating a scavenger hunt.  

For Grace (4), I made a simple scavenger hunt with words and pictures.  Because we have done a scavenger hunt before, Grace was very excited and knew just what to do.  Normally, she needs some push to keep up during our walks.  Today, hunting for Halloween items, she was our little leader.  Ada and Lucas (both 1.5) were also interested in searching for certain things, especially pumpkins and ghosts.  All the talking helps build their vocabulary because, of course, every kid needs to know words like witch, monster, and tombstone!  It did help keep them occupied too.  

Below is the Halloween scavenger hunt that we used.  We were able to find all of these items on our walk around the neighborhood.  It could also be used for a Halloween Party or  other special Halloween-related event.


Click here to open and print
If you or your child want to create your own Halloween scavenger hunt, you can print one of the formats below and fill them out any way you like. 

Click here to open and print

Click here to open and print
I hope your family has a safe and happy Halloween!  

- Jessica

Pumpkin Craft Time! {Little Ones Learning}

Thursday, October 24, 2013

A pumpkin unit wouldn't be complete without some fun pumpkin crafts.  I am very practical when it comes to crafts.  I like things that can be used for something, so I love that all of the pumpkin crafts in this post can be put to good use as decorations for Halloween and Thanksgiving.  

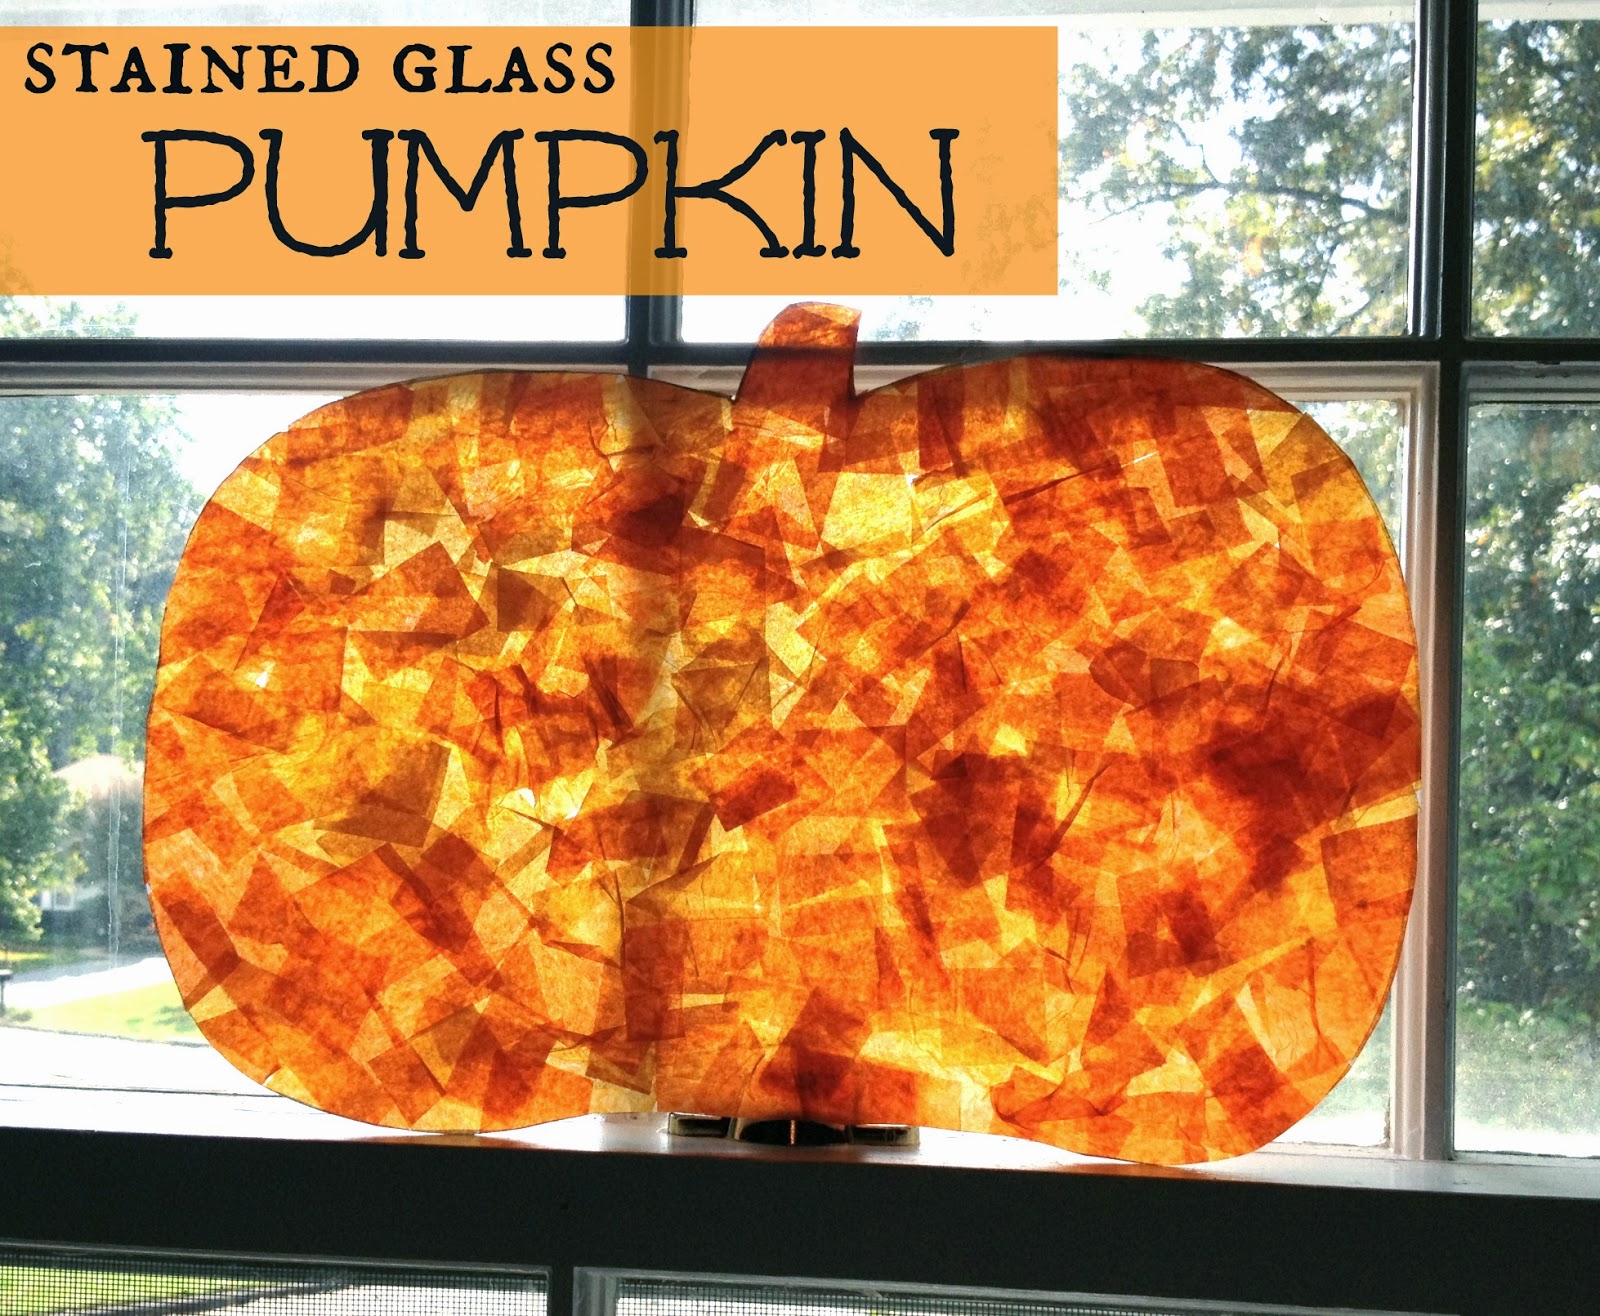
Stained glass pumpkin


I adapted this craft from some other examples I've seen for different holidays.  It is a simple craft, but it is probably best for kids ages 3 and up.  If you use contact paper instead of glue and wax paper, it could work for some younger children, as well.


You will need:

  • wax paper
  • tape
  • Elmer's glue
  • scissors
  • paint brush
  • permanent marker
  • orange tissue paper cut into squares

    *I used two different colors of orange tissue paper.  When I cut them, I first cut them into 1-inch long strips.  I didn't want the shapes to be all perfect squares, so I cut them a little sloppy to make different sized squares and rectangles.

    Here is how to make your stained glass pumpkin:

    1.  Tape a sheet of wax paper to the table.

    2.  Using the permanent marker, draw a pumpkin shape. Grace (4) was doing this project, and she had a little trouble sticking with it long enough to finish this large pumpkin.  For some children, a smaller pumpkin or a few smaller pumpkins might be best.

    3.  Put some Elmer's glue in a dish and mix in a small amount of water.  You want it a little runnier than normal, but not watery.


    4.  Using the paint brush, brush some glue onto your pumpkin shape.  It will bead up, but that is ok.

    5.  Place the tissue paper shapes onto the glue.  Continue covering the rest of the shape.  You can go over the line of your pumpkin with your tissue paper because it will be cut off later.  


    6.  As you go, brush glue over your tissue paper pieces to flatten them down.  The glue acts as a finish and will dry clear.


    7.  Let the glue dry.  Then cut out the pumpkin shape, and put up to a window to catch the sun.


    Here is Grace's finished pumpkin.  She was very proud of it, and I think it makes for a cute little decoration.

    Below are some other fun pumpkin crafts that I found in my searches that would be great for toddlers and preschoolers.  


    Paper Plate Pumpkin 
    Muffin Tin Mom
    Pumpkin Craft for Kids
    Cardboard Tube Pumpkin 
    Lifetime Moms

    Pumpkin Mache 
    Loving My Nest
    Knuckle Print Pumpkins 
    Mom Trusted
    Pumpkin Garland
    Right Start Blog
    I hope you found something that you little kiddos will enjoy!  Have fun crafting!
    - Jessica

    Pumpkin Decorating {Little Ones Learning}

    Monday, October 21, 2013

    It's about that time to start decorating pumpkins for Halloween!  Our pumpkins have been a part of our fall front porch decor for the last couple of weeks, and as we near Halloween, I've been trying to figure out what we are going to do with them!  My 4 year old is eager to carve her first pumpkin, which we will, but I also wanted to come up with something hands-on for her and my 1 1/2 year old.  In previous years, Grace has decorated pumpkins with permanent markers, which is relatively clean and easy, but I wanted to try something new this year.  So here are a few cool ideas I found:


    Stickers

    Dot Stickers Pumpkins
    Dot Sticker Pumpkins
    Putti's World
    I can't believe I hadn't thought of this myself!  It is so simple, and what parent doesn't have stickers laying around?  Using stickers would be a good fine motor activity for toddlers and preschoolers, and is about as clean as it gets.  Foam stickers would work great too!

    Glitter and gems


    Sparkly Pumpkins
    The Imagination Tree
    So this one is a little higher on the messy index, but it sure is adorable!  This example uses glitter and sequence, but you could also just use glue and tissue paper, shapes, or Halloween pictures (or pictures of anything, really).

    Leaves

    Leaf Covered Pumpkins
    Positive Parenting Connection
    I think this one is my favorite, and I will definitely be doing this to one of the many pumpkins we've collected this year.  Simply glue leaves that you've collected onto your pumpkin and coat with Mod Podge.  How cute would this be as a Thanksgiving decoration or centerpiece?!

    Pins and Buttons


    easy halloween craft
    Pin and Pound Pumpkins
    No Time for Flashcards
    Pounding pins (or nails) and buttons into a pumpkin is a clever way of creating a unique pumpkin decoration with some good old-fashioned gross motor skills practice.  This would probably be best for preschoolers, as they won't be as tempted to eat the pins, nails, or buttons or smack someone with the hammer.  If not for decorating, hammering in some pins and buttons sure would be fun before you throw out your pumpkin.

    Paint

    Painted Pumpkins
    Young House Love

    This is such a cute take on your typical pumpkin painting.  Use painter's tape to create a face, shapes, or designs on a pumpkin.  Then, let your little one paint away.  When dry, simply take off the painter's tape, and your design will be revealed.  So cute!

    I hope you find these inspiring, like I do!  Happy pumpkin decorating!
    - Jessica
     
    FREE BLOGGER TEMPLATE BY DESIGNER BLOGS